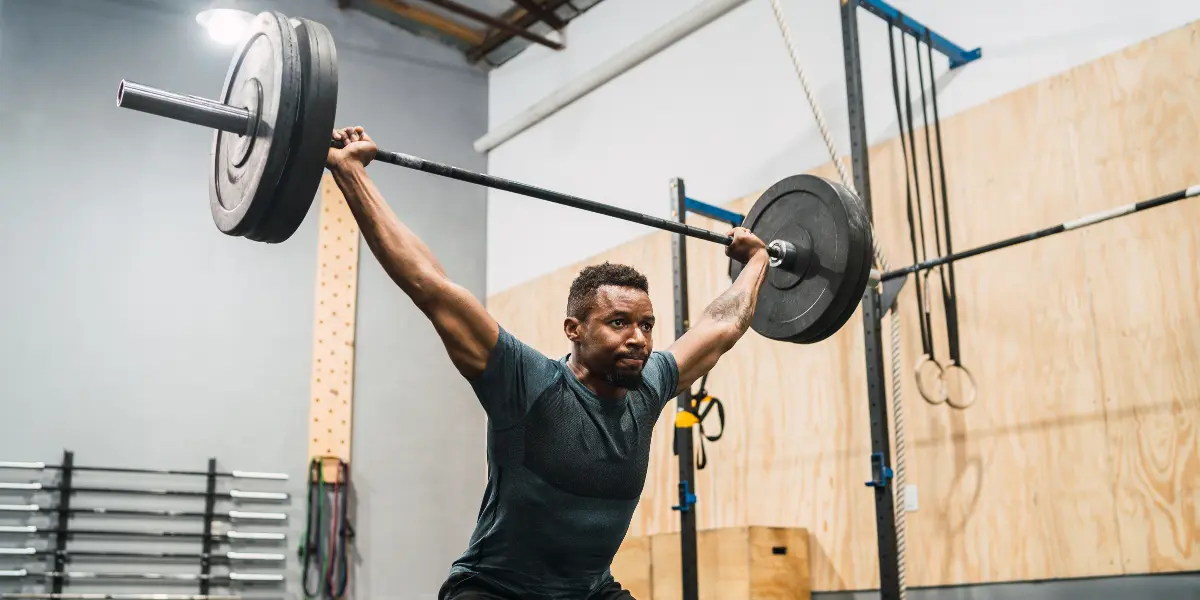
CrossFit Shoulder to Overhead: Techniques and Tips for Proper Form
Every CrossFit athlete wants to push their limits. But the shoulder to overhead movement can seem like a big challenge. I learned that mastering the overhead press is not just about being strong. It’s about knowing your body and respecting its limits.
The crossfit shoulder to overhead movement is more than lifting weight. It shows your physical strength. Many athletes face challenges due to limited shoulder mobility and bad technique. This guide will help you improve your overhead press.
Learning the right techniques can lower injury risk and boost performance. Whether you’re new or experienced, these tips will help you move better and safer overhead.
Table of Contents
Understanding the Shoulder to Overhead Movement
CrossFit athletes see the shoulder to overhead movement as key for building upper body strength. It’s a dynamic lift that works many muscles. It also boosts functional fitness and athletic power.
What is the Shoulder to Overhead Lift?
A shoulder to overhead lift is a strong CrossFit move. You lift a weight from your shoulders to fully overhead. It includes different shoulder press styles, like strict press, push press, and push jerk.
Benefits of the Shoulder to Overhead
- Boosts shoulder muscle strength and activation
- Increases upper body power
- Improves functional movement
- Enhances athletic performance and mobility
Studies show these movements really work the muscles. A study by Saeterbakken & Fimland (2013) found the overhead press works the anterior deltoid best among shoulder exercises.
Common Variations
| Variation | Key Characteristics | Difficulty Level |
|---|---|---|
| Strict Press | No leg drive, pure upper body strength | Advanced |
| Push Press | Includes leg drive for momentum | Intermediate |
| Push Jerk | Fastest movement with full body coordination | Expert |
Each shoulder press variation brings its own challenges and benefits. CrossFit athletes looking to boost their strength and technique find value in these variations.
“Mastering the shoulder to overhead movement is about understanding your body’s mechanics and progressively challenging your limits.” – CrossFit Training Manual
Key Techniques for Proper Form
Mastering the CrossFit shoulder to overhead technique needs focus and detail. Your success in this lift depends on knowing key biomechanical principles. Also, keeping proper form is essential throughout the movement.
The National Strength and Conditioning Association says shoulder strength is key for upper body power and stability. By focusing on specific technical elements, you can improve your overhead press form. This helps reduce injury risk.
Grip Position and Hand Placement
Your grip is the base of a successful shoulder to overhead lift. Here are some important points:
- Maintain a shoulder-width grip on the barbell
- Use an overhand grip with thumbs wrapped around the bar
- Keep wrists straight and aligned with forearms
- Position hands symmetrically to ensure balanced lifting
Body Alignment and Posture
Proper body alignment is key for efficient overhead press. Research from the Journal of Strength and Conditioning Research shows the importance of muscle engagement.
- Stand with feet shoulder-width apart
- Engage your core muscles
- Maintain a neutral spine
- Keep chest up and shoulders back
Breathing Techniques During the Lift
“Breath is the bridge between your body’s mechanical power and mental focus.” – Strength Training Expert
Good breathing helps your shoulder to overhead technique. Use these strategies:
| Phase | Breathing Technique |
|---|---|
| Preparation | Deep inhale before lifting |
| Lifting | Exhale while pressing overhead |
| Lowering | Controlled inhale during descent |
By using these techniques, you’ll improve your CrossFit shoulder to overhead movement. This will boost your performance and lower injury risk.
The Importance of Warm-Up Exercises
Getting your shoulders ready for a tough CrossFit workout is key. It helps you perform better and avoid injuries. A good crossfit shoulder warm-up can make all the difference.
Studies show that a proper warm-up can cut injury risk by up to 50%. Spending 10-15 minutes on mobility work boosts your shoulder performance. It also improves your overhead press drills.
Dynamic Warm-Ups for Shoulders
Dynamic stretches are vital for getting your shoulders ready for intense exercises. Here are some important warm-up techniques:
- Scapular slides to improve mobility
- Resistance band pull-aparts
- YTW exercises to activate shoulder muscles
- Kettlebell pullovers
Specific Drills for Mobility
Targeted mobility work enhances your range of motion and muscle activation. Here are some overhead press mobility drills:
- Lacrosse ball posterior shoulder release (1 minute per side)
- Thoracic mobilization with mobility peanut
- Miniband straight arm raises
- Band external rotation to Y press
Preventing Injuries with Proper Warm-Up
A thorough warm-up routine gets your body ready for intense CrossFit exercises. It activates your nervous system and prepares your muscles. Adding light cardio and movement-specific exercises can lower injury risk.
“A 10-15 minute warm-up can be the difference between peak performance and possible injury.” – CrossFit Performance Experts
| Warm-Up Component | Duration | Purpose |
|---|---|---|
| Light Cardio | 2-3 minutes | Increase heart rate |
| Soft Tissue Work | 1-2 minutes | Muscle activation |
| Dynamic Stretching | 5-7 minutes | Improve flexibility |
Remember, a strategic warm-up is your first line of defense against injuries. It prepares you for an effective CrossFit workout.
Equipment Needed for Shoulder to Overhead
Choosing the right equipment for shoulder to overhead exercises is key. It affects how well you do and keeps you safe. Knowing what tools are out there helps you train better.
Barbell vs. Dumbbell Options
You have several choices for overhead exercises:
- Barbells are stable for lifting heavy weights
- Dumbbells let you move more freely
- Each works different muscles in your body
Starting out, dumbbells might be easier to get the hang of. The standard barbell is 45 lbs when empty. This can be tough for smaller athletes.
Using a Kettlebell
Kettlebells are another great choice for overhead presses. They work your stabilizer muscles in a unique way. This is different from using a barbell.
| Equipment | Muscle Activation | Difficulty Level |
|---|---|---|
| Barbell | Full upper body | Advanced |
| Dumbbells | Anterior deltoid | Beginner-Intermediate |
| Kettlebell | Stabilizer muscles | Intermediate |
Importance of Proper Footwear
Your shoes are very important for overhead exercises. Shoes that keep your feet stable help you lift right. They also prevent injuries.
“The foundation of any great lift starts from the ground up” – CrossFit Training Principle
For the best results, get CrossFit shoes. They have stability, support, and a raised heel. These features help with your overhead presses.
Progressions for Different Fitness Levels
Creating a good CrossFit shoulder to overhead plan needs a personal touch. It’s for everyone, from beginners to pros. Learning to do overhead presses better can really boost your strength and skills.
Every person’s journey in CrossFit shoulder to overhead is unique. Your plan should change as you get stronger and better at it.
Beginner Tips for Getting Started
For newbies to overhead press, here are some key tips:
- Learn bodyweight exercises first
- Work on strict press form
- Start with light barbells or PVC pipes
- Improve your shoulder movement
Intermediate Progressions to Challenge You
When you get stronger, try these more challenging moves:
- Add push press variations
- Slowly increase the weight
- Try complex movements
Advanced Techniques for Experienced Lifters
For the pros, there are even harder shoulder to overhead moves:
| Technique | Difficulty Level | Target Muscle Groups |
|---|---|---|
| Split Jerk | Advanced | Shoulders, Legs, Core |
| Behind-the-Neck Press | Expert | Upper Back, Shoulders |
| Push Jerk with Rotation | Advanced | Full Body Coordination |
“Progressive overload is the key to continuous strength development in shoulder to overhead movements.” – CrossFit Training Manual
Remember, consistent practice and proper form are key. Listen to your body, progress slowly, and always focus on form over weight.
Common Mistakes and How to Avoid Them
CrossFit shoulder to overhead movements can be tough, even for pros. Knowing common mistakes helps improve your technique and avoid injuries. Let’s look at key overhead press form errors that can hurt your performance.

Misalignment During the Lift
Right alignment is key for a good shoulder to overhead move. Many athletes struggle to keep their body in the right spot. This can lower power and raise injury risk.
- Ensure your grip width is slightly outside shoulder width
- Keep elbows tucked to prevent unnecessary joint stress
- Maintain a vertical bar path during the entire movement
Overextending Your Back
Back hyperextension is a big mistake in overhead pressing. Too much arching strains your lower back and cuts down on lifting efficiency.
- Pack your ribs and engage your core muscles
- Maintain a neutral spine position
- Focus on bracing your abdominal muscles throughout the lift
Neglecting Core Engagement
Stable core is vital for successful shoulder to overhead moves. A weak core can cause instability and lower power during the lift.
| Core Engagement Strategies | Benefits |
|---|---|
| Bracing technique | Improves stability and power output |
| Tight abdominal muscles | Prevents lower back arching |
| Consistent breathing | Maintains core tension during lift |
“Proper technique is the foundation of effective strength training.” – Professional CrossFit Trainer
By fixing these common mistakes, you’ll get better at overhead pressing. Focus on technique and practice mindful movements to boost your lifting skills.
Incorporating the Lift into Your CrossFit Routine
Adding crossfit shoulder to overhead workouts to your routine needs careful planning. Your overhead press program should mix intensity, variety, and your fitness goals.
It’s important to know how to set up your workouts for the best results and to avoid injuries.
Structuring Your Workouts Effectively
When planning your CrossFit routine, keep these tips in mind for shoulder to overhead exercises:
- Balance pushing and pulling exercises
- Gradually increase workout complexity
- Integrate different overhead press variations
- Allow sufficient recovery between intense sessions
Suggested Drills and Workouts
Some great shoulder to overhead workouts include:
- Push press sequences
- Strict overhead press sets
- Alternating dumbbell overhead press
- Kettlebell overhead press combinations
Tracking Your Progress
Keeping an eye on your overhead press program helps you keep improving. Consider setting up a detailed tracking system:
| Metric | Tracking Method |
|---|---|
| Weight Lifted | Log maximum repetitions and weight |
| Form Quality | Video record and analyze technique |
| Recovery Time | Note muscle fatigue and soreness levels |
“Consistency is key in CrossFit shoulder to overhead training. Track your progress, stay patient, and watch your strength grow.”
Remember, everyone progresses at their own pace. Pay attention to your body and adjust your overhead press program as needed.
Safety Considerations
CrossFit shoulder to overhead movements need careful safety attention. With 19% of CrossFit participants getting injured, knowing the right techniques and limits is key to avoiding shoulder problems.

Knowing Your Limits
It’s vital to know your physical limits in crossfit shoulder to overhead safety. Up to 36% of CrossFit athletes suffer from shoulder injuries. This shows the need for slow and steady progress.
- Start with lighter weights
- Focus on perfect form before increasing intensity
- Listen to your body’s signals
Proper Spotting Techniques
Spotting is key to preventing overhead press injuries. A trained spotter can greatly lower the risk of injury during tough lifts.
| Spotting Technique | Key Considerations |
|---|---|
| Hand Placement | Support without interfering with lifter’s movement |
| Communication | Establish clear verbal signals |
| Range of Motion | Guide without restricting natural lift path |
Recognizing Signs of Fatigue
Athletes must watch for signs of fatigue. Research shows 30% of CrossFit injuries come from bad techniques and not enough warm-up.
“Your body communicates its limits – learn to listen.”
Doing mobility exercises 2-3 times a week can cut injury risks by up to 50%. Remember, rest is as important as the workout itself.
Conclusion: Mastering the Shoulder to Overhead
Your journey to mastering the CrossFit shoulder to overhead is ongoing. The military press is key, working many muscles like the deltoids and triceps. By learning the right techniques and practicing, you can boost your overhead press.
Improving your overhead press takes hard work and focus on form. Whether you’re new or advanced, keeping your technique sharp is essential. Pay attention to your form, engage the right muscles, and avoid mistakes to get better at CrossFit.
The shoulder to overhead movement is more than just a workout. It’s a way to build strength using different tools like barbells and dumbbells. Stay committed to learning, practicing safely, and pushing yourself to succeed in this powerful CrossFit skill.
Key Takeaways for Effective Lifts
Focus on proper form, increase weight gradually, and listen to your body. It’s more important to lift with control than to lift heavy.
Encouragement to Continue Improving
Your journey with the overhead press is special. See every workout as a chance to get better, build strength, and improve your fitness beyond the gym.
Resources for Further Learning
Get help from certified CrossFit coaches, watch technique videos, and keep learning about strength training.

